
Solution: Yes, please check the guide below:
NOTE: Connect the Honda HDS HIM diagnostic system to the DLC, and monitor ECT SENSOR 1. Adjust the valve clearance only when the engine coolant temperature is less than 100 °F (38 °C).
1.Remove the cylinder head covers.
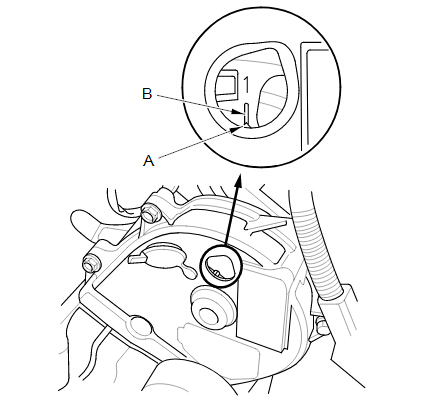
2.Set the No. 1 piston at top dead center (TDC). Align the pointer (A) on the front upper cover with the
No. 1 piston TDC mark (B) on the front camshaft pulley.
3.Select the correct feeler gauge for the valve clearance you are going to check.
Valve Clearance
Intake:
0.20-0.24 mm (0.008-0.009 in)
Exhaust:
0.28-0.32 mm (0.011-0.012 in)
NOTE: Connect the Honda HDS HIM diagnostic system to the DLC, and monitor ECT SENSOR 1. Adjust the valve clearance only when the engine coolant temperature is less than 100 °F (38 °C).
1.Remove the cylinder head covers.
2.Set the No. 1 piston at top dead center (TDC). Align the pointer (A) on the front upper cover with the
No. 1 piston TDC mark (B) on the front camshaft pulley.
3.Select the correct feeler gauge for the valve clearance you are going to check.
Valve Clearance
Intake:
0.20-0.24 mm (0.008-0.009 in)
Exhaust:
0.28-0.32 mm (0.011-0.012 in)
REAR
FRONT
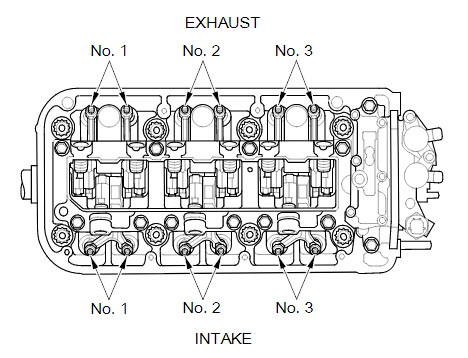
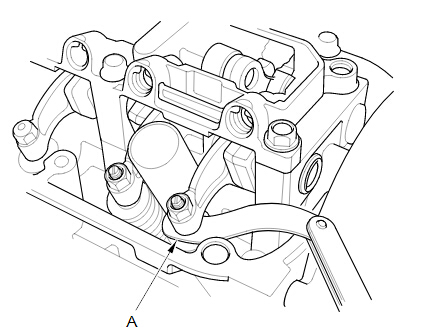
4.Insert the feeler gauge (A) between the adjusting screw and the end of the valve stem on the No. 1 cylinder, and slide it back and forth; you should feel a slight amount of drag.
INTAKE
EXHAUST
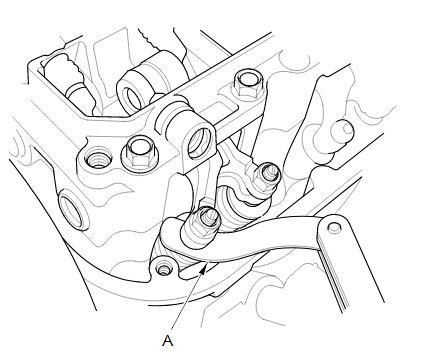
5.If you feel too much or too little drag, loosen the locknut, and turn the adjusting screw until the drag on the feeler gauge is correct.
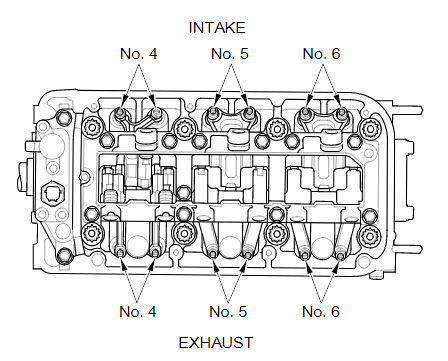
INTAKE

EXHAUST
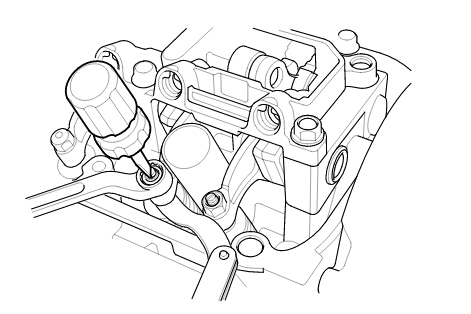
6.While holding the adjusting screw with the screw driver, tighten the locknut, then recheck the clearance. Repeat the adjustment, if necessary.
Specified Torque
No. 1, No. 2, No. 3, and No. 4 cylinders:
20 N·m (2.0 kgf·m, 15 lbf·ft)
Apply new engine oil to the nut threads.
No. 5 and No. 6 cylinders:
14 N·m (1.4 kgf·m, 10 lbf·ft)
Apply new engine oil to the nut threads.
7. Rotate the crankshaft clockwise. Align the pointer (A) on the front upper cover with the No. 4 piston TDC mark (B) on the front camshaft pulley.
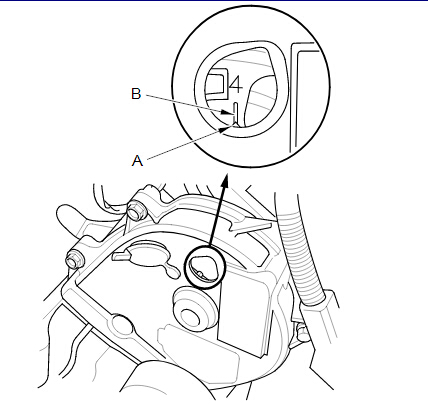
8.Check and, if necessary, adjust the valve clearance on the No. 4 cylinder.
9.Rotate the crankshaft clockwise. Align the pointer (A) on the front upper cover with the No. 2 piston TDC mark (B) on the front camshaft pulley.
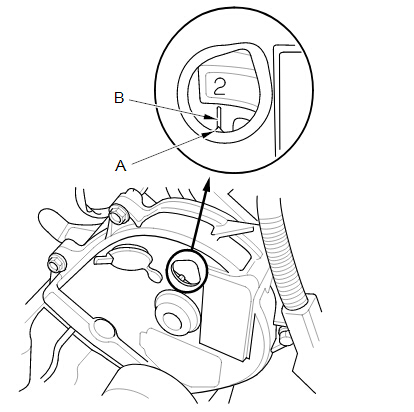
10.Check and, if necessary, adjust the valve clearance on the No. 2 cylinder.
11.Rotate the crankshaft clockwise. Align the pointer (A) on the front upper cover with the No. 5 piston TDC mark (B) on the front camshaft pulley.
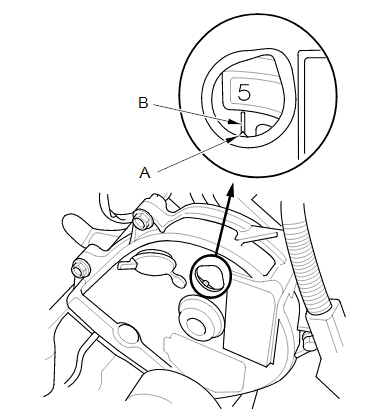
12.Check and, if necessary, adjust the valve clearance on the No. 5 cylinder.
13.Rotate the crankshaft clockwise. Align the pointer (A) on the front upper cover with the No. 3 piston TDC mark (B) on the front camshaft pulley.
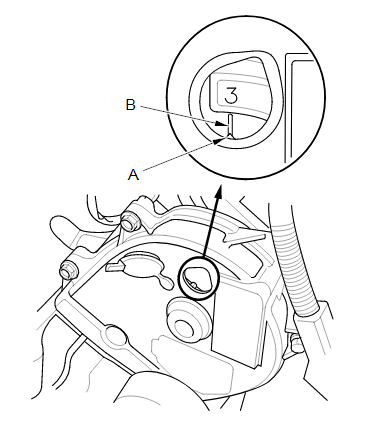
14.Check and, if necessary, adjust the valve clearance on the No. 3 cylinder.
15.Rotate the crankshaft clockwise. Align the pointer (A) on the front upper cover with the No. 6 piston TDC mark (B) on the front camshaft pulley.
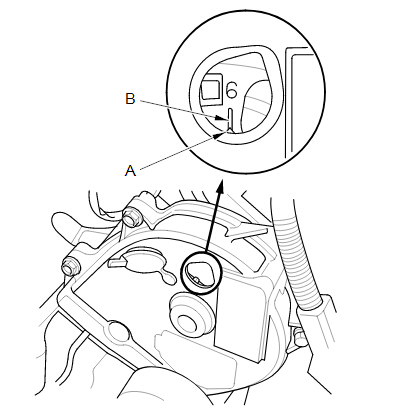
16.Check and, if necessary, adjust the valve clearance on the No. 6 cylinder.
17. Install the cylinder head covers.